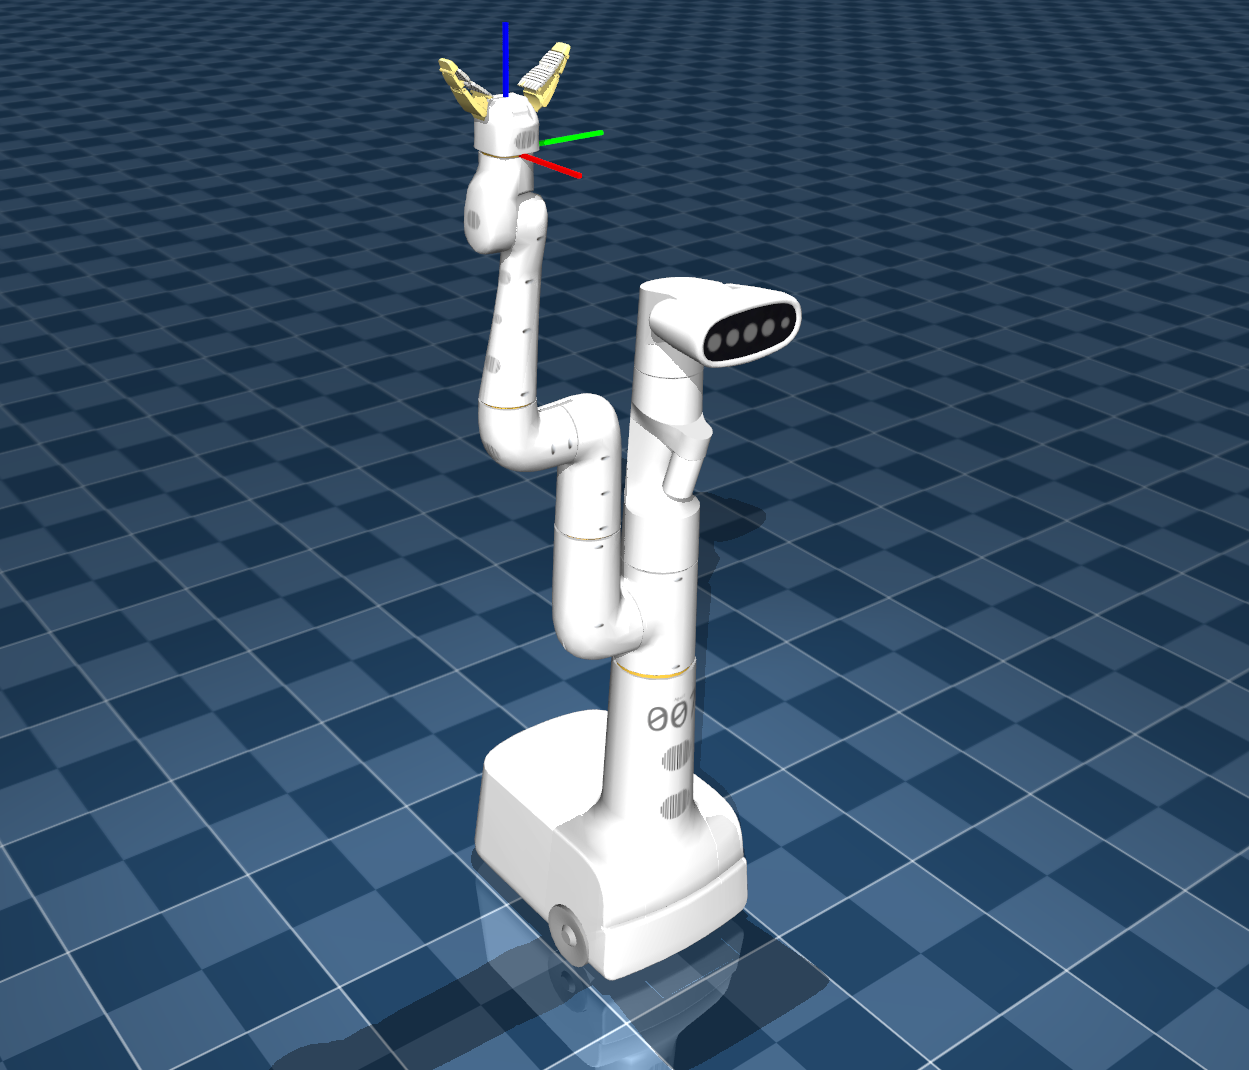
We use mocap to control the Google Robot and move the end effector to a desired position using the keyboard.
In the previous tutorial, we created a mocap object that we controlled with a keyboard. In this tutorial, we will use the mocap object to control the Google Robot by using the keyboard. The end-effector moves with the mocap object and mujoco’s inverse dynamics solver will calculate the required joint positions, torques etc to move the end-effector to the desired position.
The full code can be found in the repository here.
Google Bot
For the Google Bot, we will use mujoco menagerie. It has the XML description of the Google Bot.
This model only has the manipulation part and not the locomotion part. We will use the mocap object to control the end-effector of the robot but the robot will not roll or move and will stay in the same position.
Creating the mocap object
The first step in creating in mocap object is to determine where we want to put it. This has to be defined in global coordinates. We want to put it at the end-effector of the robot. Thus, the position we want to put the mocap will be the position of the end-effector in the global coordinate system.
The end-effector is defined in the robot’s local coordinate system relative to the parent object in the XML file. We will use the link_gripper body as the position where we want to put the mocap object.
Thus, we have to next find the position of the end effector in global position. We can find the position of the end-effector in the global coordinate system by using the body_xpos field of the robot but that involves running mujoco with the scene.xml and getting the position and quaternion of the end-effector.
# Load the mujoco model basic.xml
model = mujoco.MjModel.from_xml_path(xml_file)
data = mujoco.MjData(model)

# Get the ID of the body we want to track
body_id = model.body(body).id

# Do forward kinematics
mujoco.mj_kinematics(model, data)

# Get the position of the body from the data
body_pos = data.xpos[body_id]
body_quat = data.xquat[body_id]
print(body_pos, body_quat)
This snippet of the code will give us the position and quaternion of the body in the global coordinate system. We run mujoco for one kinematic step to populate the data object with the position and quaternion of the body.
A working example of this can be found here where we send the xml and body files as command line parameters.
Now, to add the mocap, we need to add the mocap object to the XML file.
<body mocap="true" name="mocap" pos="2.8000000e-16 -3.3000160e-01  1.6436609e+00">
    <site pos="0 0 0.075" size="0.003 0.003 0.1" type="box" name="mocap_left_site1" rgba="0 0 1 1"/>
    <site pos="0 0.075 0" size="0.003 0.1 0.003" type="box" name="mocap_left_site2" rgba="0 1 0 1"/>
    <site pos="0.075 0 0" size="0.1 0.003 0.003" type="box" name="mocap_left_site3" rgba="1 0 0 1"/>
</body>
The default quaternion is [1 0 0 0 ] and so doesn’t have to be specified.
The 3 site objects are used to visualize the mocap object and is not necessary. This is carried over from the first tutorial.
Mocap Control
This is the visual output of mujoco.
With the quaternion [1 0 0 0], we might expect the end effector to be pointing in a different direction. But, the 3d meshes for gripper are defined to point upward and so have to adjust any quaternions we use accordingly if we were interacting with other objects in the scene. Since we are just using the keyboard to adjust the position of the end-effector, we don’t have to worry about the orientation of the end-effector and adjusting for this is beyond the scope of this tutorial.

Here it the video of the mocap object controlling the end-effector of the robot in all the 6 degress of freedom.
The code for this video can be found here with the XML file here.
